Regenerative Circular Farming with Mulch Fermenting Bins
At Velan Farm, mulch and composting are not waste-management tools, they are core regenerative engines. Through Mulch Fermenting Bins, we transform crop residues, animal manures, and food byproducts into biologically active soil amendments that continuously feed soil life, improve structure, and close nutrient loops across the farm. This system mimics natural decomposition processes while accelerating nutrient availability and carbon stabilization.
Why Mulch Fermenting Bins?
- Faster decomposition with reduced nutrient loss
- Enhanced microbial diversity (bacteria, fungi, actinomycetes)
- Reduced odors and greenhouse gas emissions
- Improved moisture retention and soil aggregation
- Seamless integration with livestock, poultry, aquaculture, and crop systems
Step-by-Step Regenerative Composting Process
Step 1: Site Selection (Soil-Connected Systems)
- Place bins on bare soil to allow microbial exchange with native soil organisms
- Ensure easy water access for moisture management
- Provide partial shade to prevent overheating and desiccation
Step 2: Mulch Fermenting Bin Setup
- Use covered fermenting bins or modular compost bays
- Construct bins using recycled or upcycled materials where possible
- Design for airflow, drainage, and easy turning or layering
These bins allow materials to ferment first, then fully compost, retaining nutrients that are often lost in open piles.
Step 3: Feedstock Collection (Circular Inputs)
Green Materials (Nitrogen-Rich):
- Vegetable scraps and crop residues
- Fresh plant trimmings and green weeds
- Manure from herbivorous livestock (cattle, goats, poultry)
- Aquaculture plant residues
Brown Materials (Carbon-Rich):
- Dry leaves and straw
- Wood chips, sawdust, shredded cardboard
- Pruned branches (chipped)
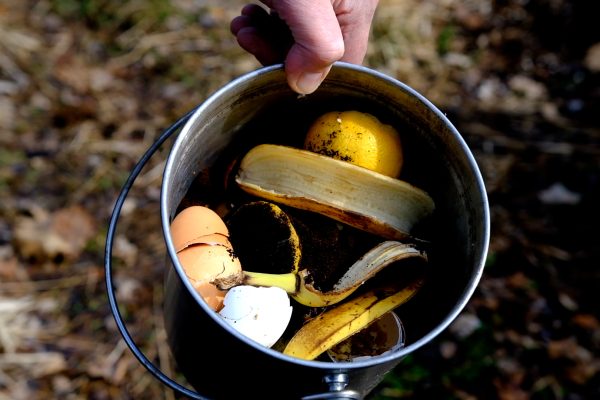
- Eggshells and plant-based kitchen waste
Avoid:
- Meat, fish, dairy, oils
- Diseased or chemically treated plants
- Pet or human waste
Step 4: Layering for Biological Balance
- Base layer: Coarse woody material (aeration & drainage)
- Carbon layer: Dry leaves or straw
- Nitrogen layer: Green waste or manure
- Biological inoculant: Soil, finished compost, or fermented plant material
- Repeat layers until bin is filled
This structure supports balanced microbial activity and efficient fermentation.
Step 5: Moisture, Aeration & Fermentation
- Maintain moisture at “damp sponge” level
- Turn or mix periodically to manage oxygen levels
- Monitor heat, warm internal temperatures indicate active biology
- Fermentation phase stabilizes nutrients before full composting
Step 6: Finished Compost & Mulch Use
Compost is ready when it is:
- Dark, crumbly, and earthy-smelling
- Free of recognizable feedstock
Applications across Velan Farm:
- Orchard mulching and tree basins
- Vegetable beds and greenhouse soils
- Pasture and grazing land regeneration
- Nursery and seed-starting mixes
Circular Impact Across the Farm
Mulch fermenting bins connect all farm systems:
- Crop residues → compost → soil → crops
- Livestock manure → fermented mulch → soil carbon
- Aquaculture waste → plant nutrition
- Prunings and leaves → orchard mulch
Nothing leaves the system. Everything feeds the soil.
Regeneration Starts on the Ground
By converting organic “waste” into living soil inputs, Velan Farm’s mulch and composting systems:
- Build long-term soil fertility
- Increase water retention and drought resilience
- Support microbial and fungal networks
- Reduce external fertilizer dependency
Healthy soil is built, not bought. Regeneration begins with mulch.